How to Read a Home Inspection Report Before Closing: Your Complete 2026 Guide
Reading time: 14 minutes
You’ve found the home. Made the offer. Survived the negotiation. And now a 47-page document has just landed in your inbox — your home inspection report — and closing day is in less than two weeks. Sound familiar?
Here’s the honest truth: most homebuyers skim their inspection report, panic at the red flags, or worse, ignore the whole thing until a problem surfaces six months after move-in. In 2026, with median home prices still hovering above $415,000 in many U.S. metro markets and mortgage rates demanding every dollar counts, this is one document you simply cannot afford to misread.
This guide will walk you through exactly how to read a home inspection report — not just understand it, but strategically use it before you ever sit down at the closing table.
Table of Contents
- What Is a Home Inspection Report, Really?
- The Anatomy of a Modern Inspection Report
- Understanding Severity Levels: Critical vs. Minor
- Red Flags You Should Never Ignore
- Turning Findings Into Negotiating Power
- Real-World Case Studies: Learning From Other Buyers
- How Inspection Issues Stack Up: By the Numbers
- Frequently Asked Questions
- Your Pre-Closing Inspection Action Plan
What Is a Home Inspection Report, Really?
Before we dive into the mechanics of reading one, let’s reset expectations. A home inspection report is not a pass/fail document. It is not a list of reasons to walk away, nor is it a guarantee that nothing will go wrong after you move in. Think of it as a detailed health snapshot of a property — taken on a single day, by a single professional, observing what is visible and accessible.
In 2026, certified home inspectors typically follow standards set by the American Society of Home Inspectors (ASHI) or InterNACHI, both of which updated their Standards of Practice in 2024 to include expanded guidelines for EV charging infrastructure, smart home systems, and energy-efficiency components — reflecting the realities of modern housing stock.
According to a 2025 InterNACHI industry survey, the average home inspection report now contains between 40 and 80 individual findings, up from roughly 25–40 a decade ago. This growth reflects more sophisticated inspection software, broader scope of review, and frankly — older housing inventory that’s accumulated more wear.
“The inspection report is a communication document, not a condemnation document. The challenge is teaching buyers how to read it that way.”
— Karen Solis, Certified Master Inspector, Texas, 2025 InterNACHI Conference
That framing matters. Every home — even a brand-new build — will have findings in an inspection report. Your job isn’t to find a perfect house. It’s to understand what you’re buying.
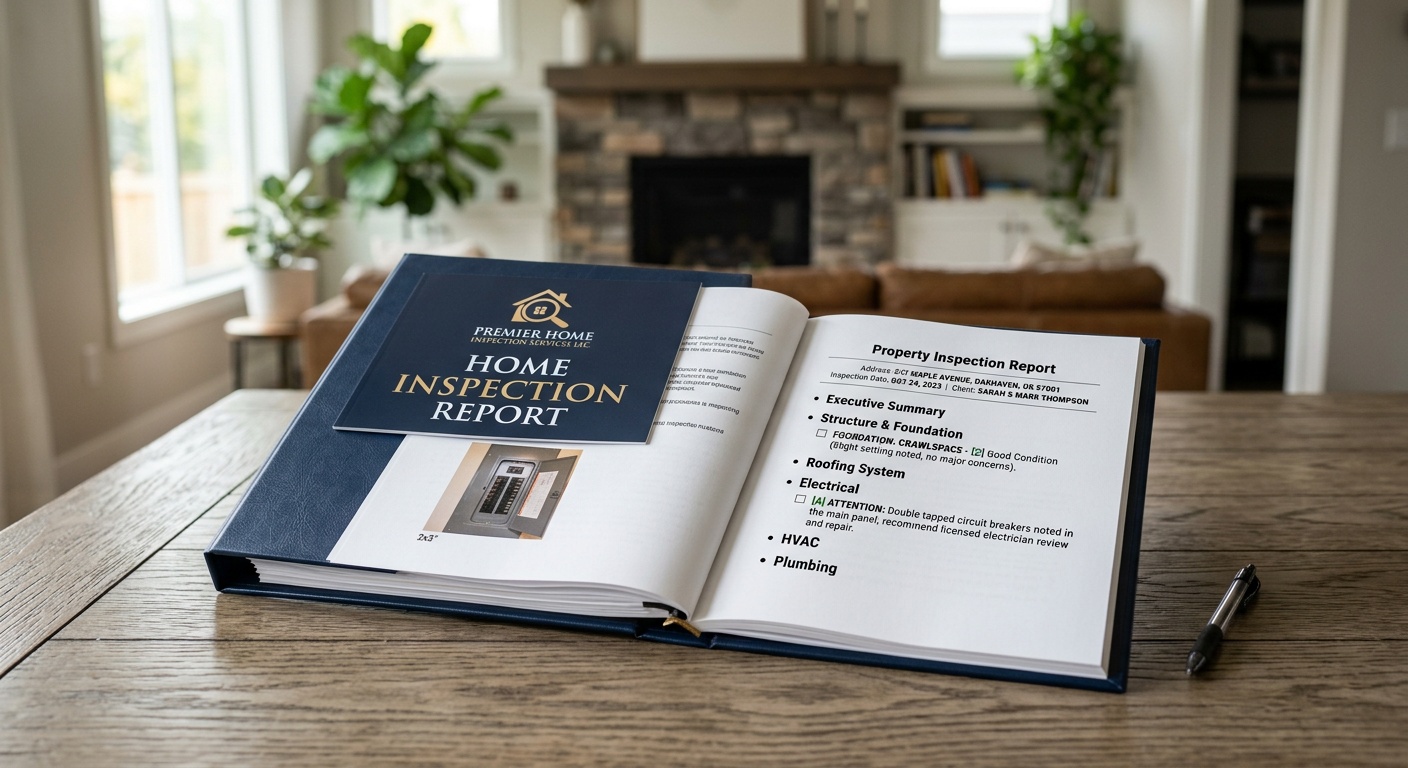
The Anatomy of a Modern Inspection Report
Modern inspection reports are typically delivered as PDF documents, with many inspectors now using digital platforms like HomeGauge, Spectora, or Horizon that include photos, embedded videos, and summary dashboards. Here’s how they’re generally structured:
The Summary Section: Your Starting Point
Most reports open with a Summary Page — and this is both the most useful and most dangerous place to start. It’s useful because it gives you a fast overview of the most significant findings. It’s dangerous because buyers who only read the summary often miss critical context buried in the body of the report.
The summary typically categorizes findings into tiers:
- Safety Hazards — Issues that pose an immediate risk to occupants
- Major Defects — Significant problems that affect livability or value
- Minor Defects / Maintenance Items — Things that need attention but aren’t urgent
- Informational Notes — Observations that don’t require action but provide context
Pro Tip: Read the summary first for orientation, but always go back to the full section for context on any finding that concerns you.
System-by-System Breakdown: Where the Details Live
After the summary, the report breaks down the property by system. A standard 2026 inspection report will cover:
- Roof — Age, material, condition, drainage, flashing
- Exterior — Siding, grading, walkways, decks, garage
- Foundation & Structure — Visible structural components, basement/crawlspace
- Electrical — Panel, wiring, outlets, GFCI protection, load capacity
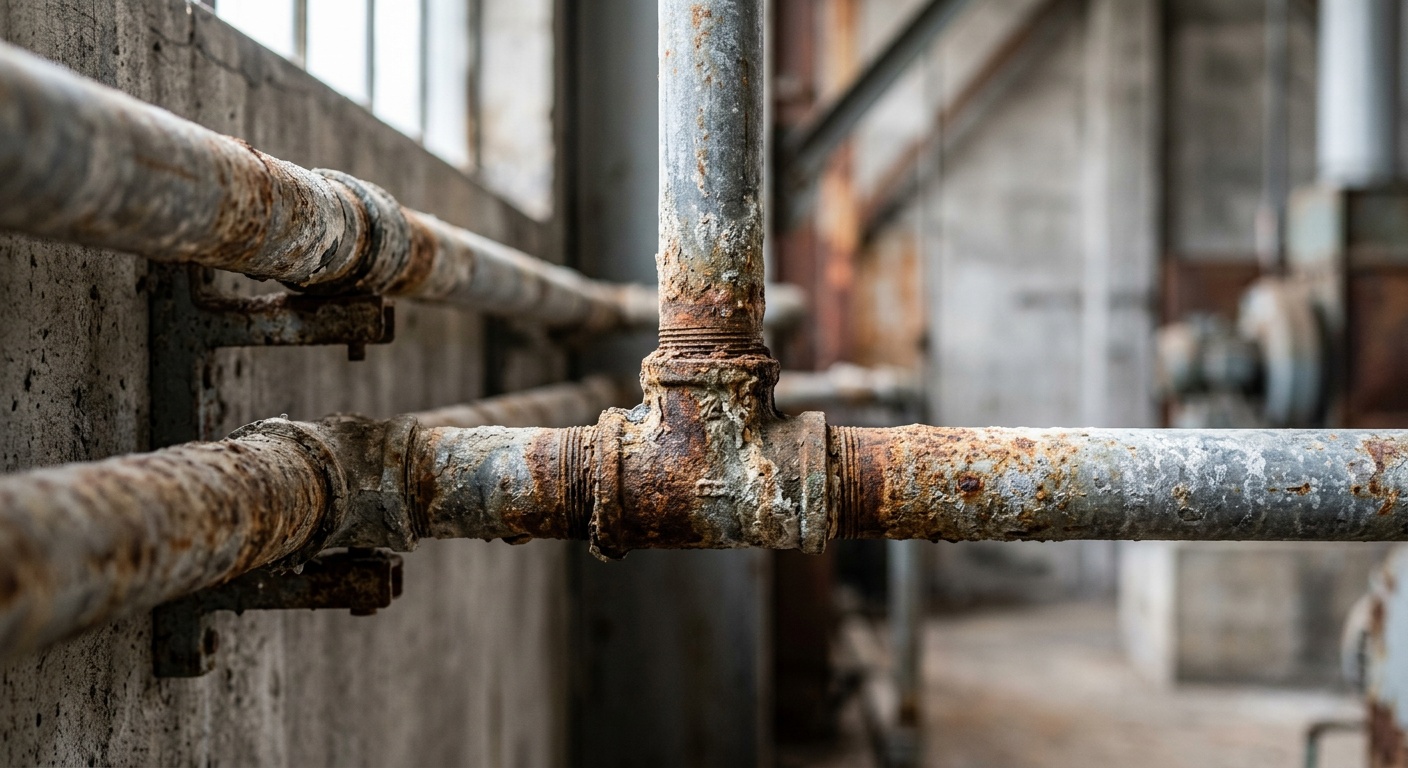
- Plumbing — Supply lines, drain lines, water heater, fixtures
- HVAC — Heating, cooling, ventilation, filters, ductwork
- Insulation & Ventilation — Attic and wall insulation, moisture barriers
- Interior — Walls, ceilings, floors, windows, doors, stairs
- Fireplace & Chimney (if applicable)
- Energy Systems — Solar panels, EV infrastructure, smart thermostats (increasingly common by 2026)
Each section should include: the inspector’s observation, photos of the finding, an assessment of severity, and a recommended action (monitor, repair, or consult a specialist).
Understanding Severity Levels: Critical vs. Minor
Here’s where most first-time buyers get tripped up. Not all findings are created equal, and treating every item on a 60-item report with equal urgency will leave you paralyzed — or worse, it might cause you to overlook the one item that truly matters.
The Three-Tier Framework for Assessing Findings
Think of every inspection finding through three lenses: Safety, Cost, and Complexity.
Safety: Does this issue create risk for you, your family, or future occupants? Faulty wiring, non-functional carbon monoxide detectors, improperly vented gas appliances — these are non-negotiables. They need to be fixed before you close, full stop.
Cost: What is the realistic repair or replacement cost? A cracked window pane might cost $200. A failing HVAC system might cost $8,000–$15,000. A foundation issue with active water intrusion could run $25,000+. Always put dollar figures to findings — inspectors often won’t do this themselves (it’s outside their scope), so you may need to call in a contractor for estimates.
Complexity: Is this a DIY fix, a licensed tradesperson job, or a specialty contractor situation? A loose door handle is complexity level 1. Knob-and-tube wiring in an older home is complexity level 5 — not just because it’s costly, but because it may affect your homeowner’s insurance eligibility.
Once you run each finding through this framework, you’ll quickly see which items belong in which bucket. Here’s a comparative breakdown:
| Finding Type | Safety Risk | Avg. Repair Cost (2026) | Negotiation Priority | Urgency Level |
|---|---|---|---|---|
| Electrical Panel Issues | High | $1,800 – $4,500 | Essential | Before Closing |
| Roof Replacement Needed | Medium | $9,000 – $22,000 | High | Within 1–2 Years |
| Water Heater Aging | Low | $1,200 – $2,800 | Moderate | Within 1–3 Years |
| Foundation Crack (Active) | High | $5,000 – $30,000+ | Critical | Immediate |
| Minor Caulking / Grout | None | $50 – $300 | Low | DIY When Convenient |
Red Flags You Should Never Ignore
Some findings in an inspection report are genuinely serious enough to warrant pausing the transaction — or at minimum, getting specialist evaluations before you commit. In 2026, here are the findings that consistently rise to the top of the “don’t skip this” list:
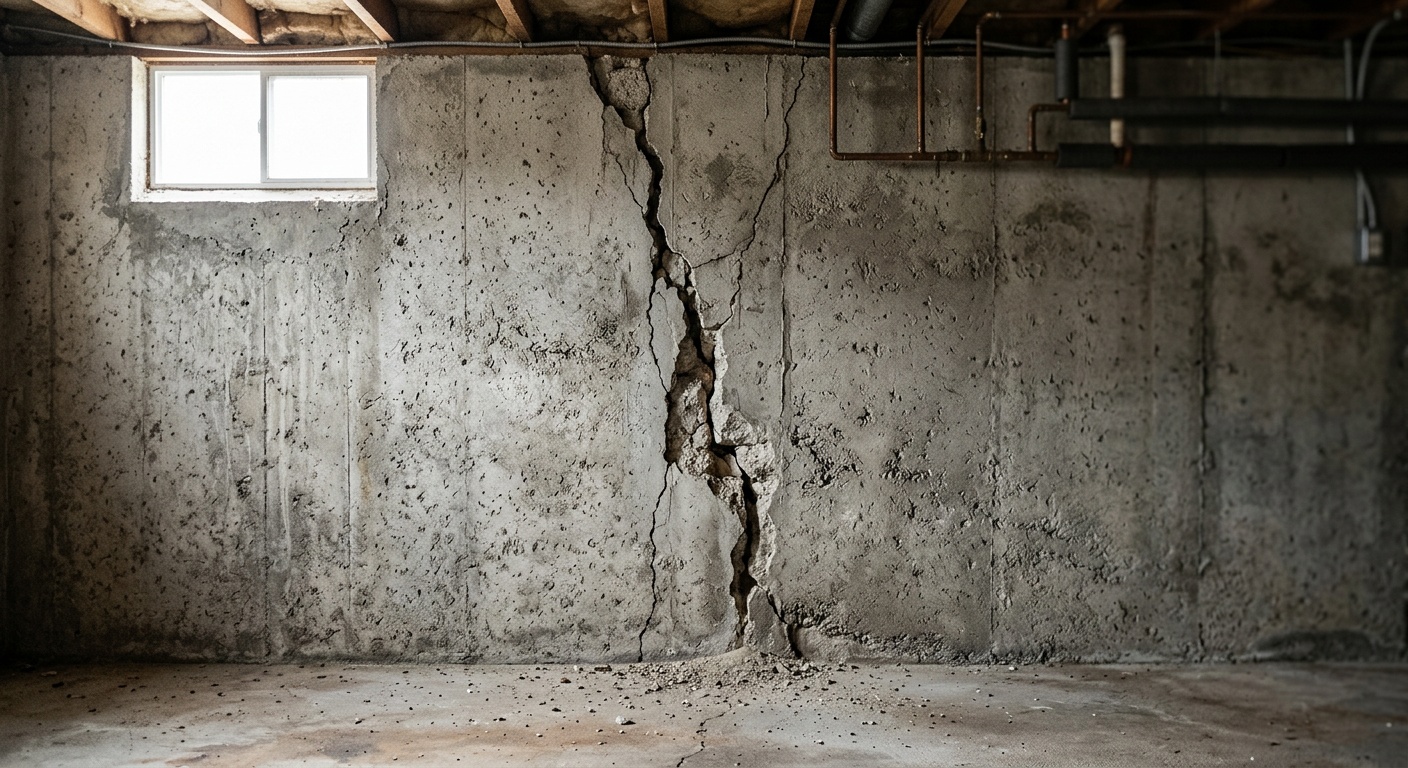
Structural and Foundation Concerns
Any inspector notation about foundation movement, significant cracking, bowing walls, or evidence of prior repair should trigger a separate structural engineer’s evaluation. Home inspectors are generalists — they’re not structural engineers. When they flag foundation issues, they’re telling you to dig deeper, not that the house is doomed. Get a structural engineer in before closing. Their report will either reassure you or give you ammunition to renegotiate.
According to a 2025 National Association of Realtors survey, foundation issues were cited in 31% of failed real estate transactions where the deal fell apart after inspection — the single most common deal-breaker category.
Electrical Red Flags in 2026
The electrical landscape has evolved significantly. Older homes with Federal Pacific or Zinsco panels continue to surface in inspections — and many insurers in 2026 refuse to write homeowner’s policies on homes with these panels. If your report flags either of these brands, you have two choices: negotiate a replacement credit before closing, or be prepared to replace it yourself immediately after.
Other electrical concerns to take seriously: ungrounded outlets, double-tapped breakers, aluminum wiring in post-1965 construction, and absence of AFCI (arc-fault circuit interrupter) protection in sleeping areas — now required in most jurisdictions under the 2023 and 2026 NEC updates.
Water: The Silent Deal-Wrecker
Evidence of water intrusion — past or present — deserves intense scrutiny. Look for inspector language like: “staining consistent with past moisture,” “active efflorescence,” or “soft subfloor material.” These phrases are code for potential mold, rot, or drainage problems that could cascade into five-figure repairs.
Ask your inspector directly: “Is this evidence of a past, resolved issue, or does this look like something ongoing?” Their verbal elaboration often reveals far more nuance than the written report captures.
Turning Findings Into Negotiating Power
Here’s where your strategic reading pays off. Once you’ve categorized findings by severity and assigned rough cost estimates, you have a fact-based framework for negotiating with the seller.
In the current 2026 market — where many regions have seen a slight softening from 2024’s peak frenzy — buyers have somewhat more negotiating leverage than they did two or three years ago. Use it wisely, not indiscriminately.
Three negotiation approaches to consider:
- Request repairs before closing — Ideal for safety issues. Ask the seller to make specific, contractor-verified repairs. Always request copies of permits and receipts.
- Request a closing credit — Often cleaner for both parties. Instead of the seller managing repairs (with uncertain quality), you receive a dollar amount at closing that you use to address the issues yourself. This gives you control over contractor selection and timing.
- Price reduction — For larger systemic issues (like a failing HVAC or roof needing replacement), a price reduction can be more appropriate than a credit, as it affects your mortgage basis and long-term equity position.
Critical Strategy Note: Don’t nickel-and-dime sellers on a list of 15 minor items. Pick your battles — focus negotiations on the 2–3 findings that genuinely matter financially or structurally. Buyers who try to negotiate every single line item often lose goodwill and miss the bigger concessions.
Real-World Case Studies: Learning From Other Buyers
Case Study 1: The Overlooked Attic
In early 2025, Marcus and Lena W. were purchasing a 1978 colonial in suburban Philadelphia. Their inspection report included a brief note in the attic section: “Insulation compressed in several areas; ventilation appears insufficient.” Buried on page 34, it barely registered. They focused instead on negotiating a credit for the aging water heater.
Four months after closing, they discovered significant mold growth across the attic decking — a direct result of condensation buildup from inadequate ventilation trapping moisture year-round. Remediation and re-insulation cost $14,200 out of pocket. In retrospect, that single inspection line item was the most expensive sentence they ever skimmed past.
Lesson: Attic and crawlspace sections are often skimmed but frequently contain the seeds of expensive future problems. Read them word for word.
Case Study 2: Using the Report as a Negotiation Tool
Priya S., a first-time buyer in Austin, Texas, received a 2026 inspection report on a 2003 home listing at $489,000. The report flagged a 19-year-old HVAC system (end of typical life expectancy), double-tapped breakers in the electrical panel, and improper grading causing water drainage toward the foundation.
Rather than getting overwhelmed, Priya categorized these into three separate issues: HVAC ($9,500 replacement estimate), electrical panel corrections ($850 electrician quote), and drainage correction ($2,100 grading work). Total estimated cost: $12,450. She requested a $10,000 closing credit — a number that acknowledged the real costs without overreaching. The seller countered at $7,500. They settled at $8,800.
Priya closed on the home and had the HVAC replaced within 60 days with full control over contractor selection. She turned a potential deal-breaker into a $8,800 financial advantage by reading the report methodically and building a cost-based case.
How Inspection Issues Stack Up: By the Numbers
Based on aggregated data from over 1.2 million inspections conducted across the U.S. in 2025 (InterNACHI Inspection Data Report, 2025), here’s how commonly specific issue categories appear in home inspection reports:
Most Common Inspection Findings (2025 Data)
Source: InterNACHI Inspection Data Report, 2025 (1.2M+ inspections analyzed)
The key insight here: finding these issues in your report is normal. Grading and drainage problems show up in nearly 7 out of 10 inspections. This doesn’t mean they should be dismissed — it means context matters enormously. A minor slope adjustment is very different from chronic water pooling against a foundation.
Common Challenges When Reading Inspection Reports — And How to Overcome Them
Challenge 1: Inspector Jargon and Passive Language
Inspection reports are full of professionally cautious language. Phrases like “recommend further evaluation,” “evidence consistent with,” or “condition appears to be” are deliberate hedges that protect the inspector legally but can feel maddeningly vague to a buyer trying to understand actual risk.
Solution: Always follow up with your inspector via phone or video call. A 15-minute conversation will unlock far more clarity than re-reading a paragraph five times. Ask: “On a scale of 1 to 10, how concerned should I be about this finding?” Most experienced inspectors will give you a straight answer in conversation even when their written language is measured.
Challenge 2: Photo Overload Without Context
Digital inspection platforms can include 100+ photos. Without understanding what you’re looking at, the visual documentation creates anxiety without clarity.
Solution: For each photo that concerns you, locate the corresponding written description. The photo is evidence; the text is interpretation. Focus first on photos tagged under Safety or Major Defects categories — these are the inspector’s most deliberate visual documentation choices.
Challenge 3: Not Knowing What’s Normal for the Home’s Age
A 1960 brick ranch and a 2018 suburban build will have dramatically different inspection profiles. Buyers who don’t calibrate expectations to the home’s age and construction type often either over-react to normal aging or miss genuinely concerning findings that are atypical for that era.
Solution: Ask your real estate agent or inspector: “For a home of this age and construction, what findings here are typical versus concerning?” This single question reframes the entire report in the right context.
Frequently Asked Questions
Should I attend the home inspection in person?
Absolutely, yes — and this cannot be overstated. Being present during the inspection gives you the opportunity to hear the inspector’s real-time commentary, ask questions on the spot, and physically see issues in context. A photo of a crack in a basement wall communicates very differently when you’re standing in front of it. Most inspectors welcome buyer attendance and will walk you through significant findings as they encounter them. If you can only be there for part of the inspection, prioritize the attic, basement, and electrical panel walkthroughs — these areas generate the most consequential findings in 2026 inspections.
How many findings in an inspection report is “too many” before I should walk away?
There is no magic number — and this is one of the most common misconceptions buyers carry into the process. A 70-item report on a well-maintained older home can be far less alarming than a 15-item report where three of those items involve structural movement, active water intrusion, and a compromised electrical system. What matters is the nature and cost of the findings, not the quantity. Focus your analysis on the safety, cost, and complexity framework described earlier in this guide. Walk away only when the combination of required repairs exceeds what the seller is willing to credit or when specialist evaluations reveal issues that fundamentally change the value equation of the property.
What happens if the seller refuses to negotiate after a serious inspection finding?
In 2026, most standard purchase contracts include an inspection contingency that gives buyers the right to exit the transaction within a specified window (typically 7–14 days) if inspection findings are not satisfactorily addressed. If a seller declines to negotiate on a significant finding — say, an inspector-flagged active foundation issue — you generally have three options: accept the property as-is and absorb the repair cost, attempt a final counter-offer with updated contractor bids, or exercise your contingency and walk away with your earnest money returned. Consult your real estate attorney before making this decision, as contingency deadlines and terms vary by state and contract. Never let urgency pressure you into waiving your rights around a genuinely serious finding.
Your Pre-Closing Inspection Action Plan
You’ve now got the framework. Here’s how to put it into motion — a concrete, step-by-step plan for the days between receiving your inspection report and sitting at the closing table.
As housing markets continue to demand financial precision and buyer confidence in 2026, treating your inspection report as a strategic document — not just a paperwork formality — is one of the most valuable skills you can develop as a homeowner or investor.
Your 5-Step Pre-Closing Inspection Roadmap:
- Read the full report within 24 hours of receipt. Don’t wait. Your negotiation window is time-limited. Read end-to-end, not just the summary. Flag any finding you don’t understand.
- Call your inspector for a 15-minute debrief. Before you spiral into Google searches, go straight to the source. Ask about the 3–5 items that concern you most and ask them to speak plainly about severity.
- Obtain at least one contractor estimate for any major finding. Turn inspection line items into dollar figures. This is your negotiation currency. For anything over $2,000, get a formal written estimate.
- Categorize findings into: Must Fix Before Closing / Credit Request / Accept and Monitor. Share this prioritized list with your real estate agent as the basis for your repair request or credit negotiation.
- Confirm repair completion or credits before your final walk-through. If the seller agreed to repairs, verify the work was professionally completed with permits and receipts — not patched over. Your final walk-through exists precisely for this verification.
Key Takeaways:
- No home inspection report is a clean slate — findings are expected and normal
- Safety, Cost, and Complexity are your three-lens framework for every finding
- Negotiation is most effective when it’s specific, cost-based, and focused on 2–3 priority items
- Always read the attic and crawlspace sections word for word — they hide the most expensive surprises
- Your inspection contingency is a legal protection — understand its deadline and never waive it lightly
The home inspection report is, at its core, a knowledge transfer. Someone who knows buildings spent several hours examining your potential new home and documented everything they found. Reading it well means you walk into closing with clear eyes — knowing what you’re buying, what it may cost you, and exactly what you negotiated to protect yourself.
So here’s the question worth sitting with: If you received your inspection report tomorrow, would you know within the first read whether the home is worth closing on — or would you be guessing? The difference between those two answers is the difference between a confident homeowner and an anxious one. You now have the tools to be the former.